Welcome to E1!
The E1 platform connects you with a vast network of 10,000 subcontractors, enhancing coverage for your projects and facilitating seamless tendering processes.
You can watch a quick tutorial video here:
Navigating your account
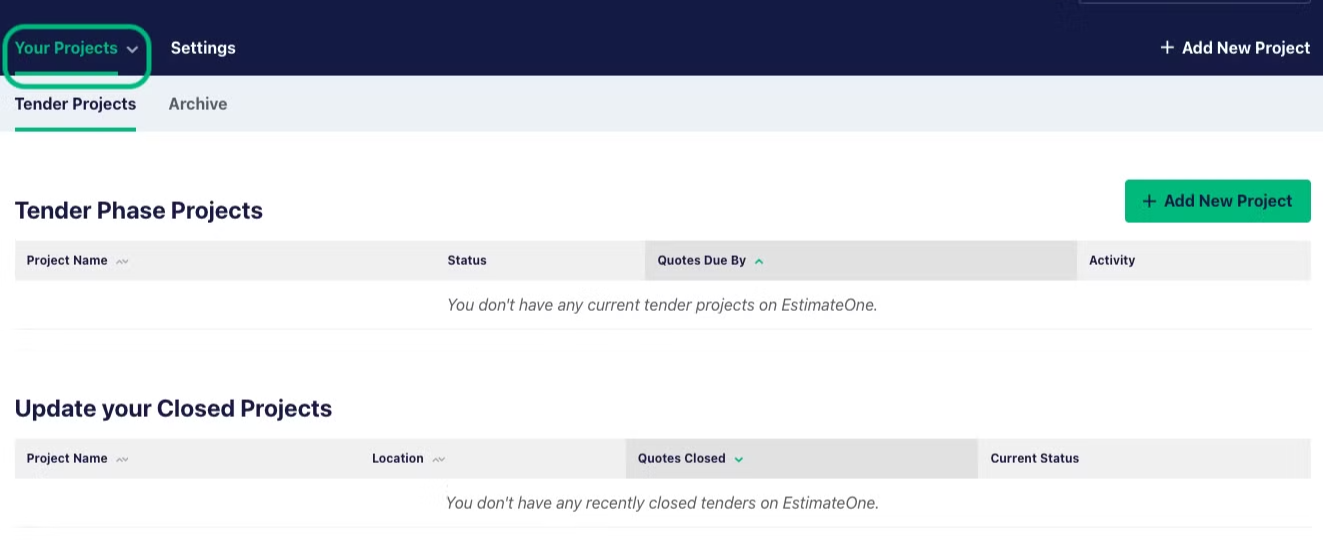
The Your Projects tab
Upon logging in, you'll land on the Your Projects tab.
Here you can access:
Your Projects:
- Create and manage projects you're tendering.
- Load and update documents
- Manage requests for documentation from trade-matched subcontractors and suppliers
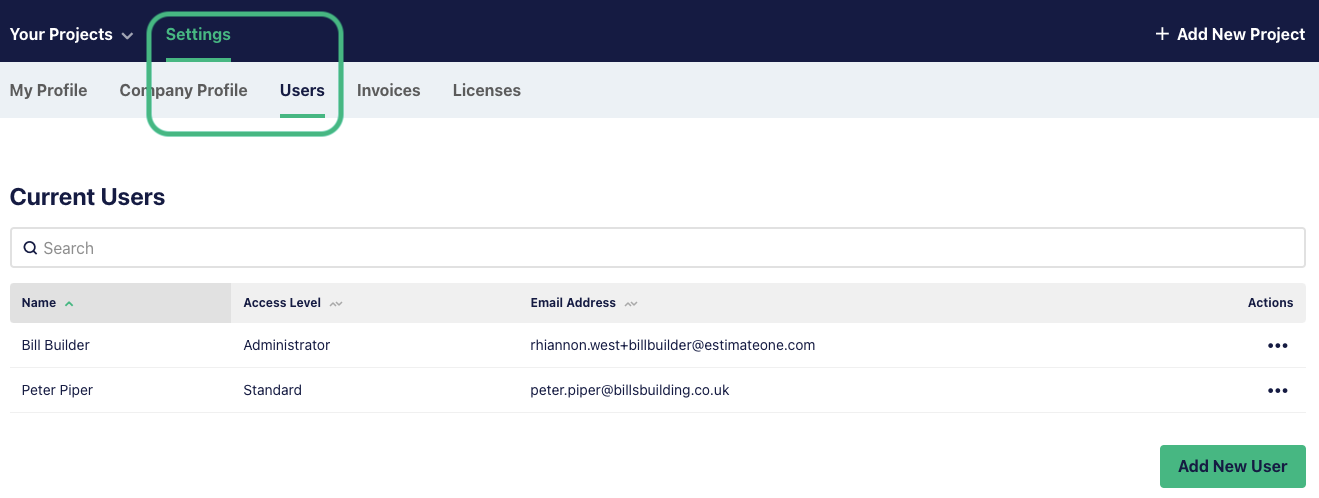
The Settings Tab
- Add team members to your account, granting them access to projects
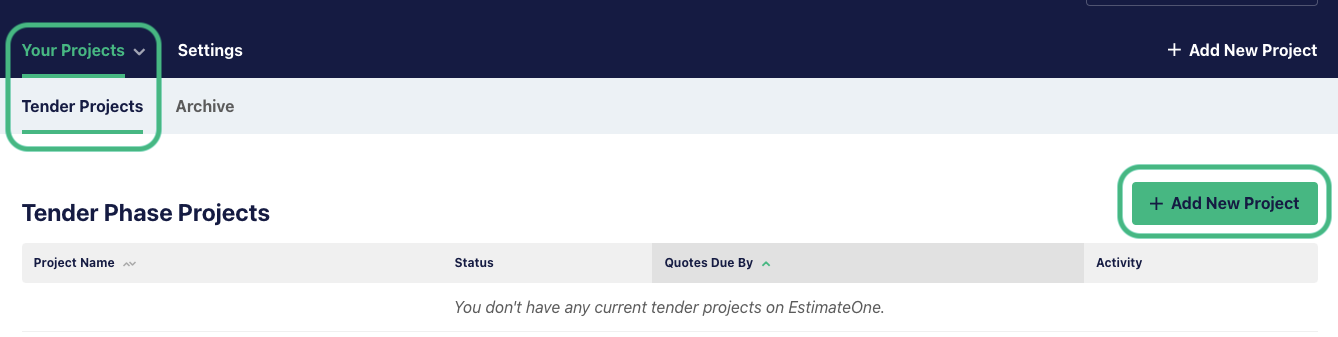
Creating a project
Projects are added from the 'Your Projects' tab.
To get started, click ‘+ Add New Project’
Step 1 - Filling in the New Project Wizard

1. Create a Project Name. This could be the location of the project or something more descriptive like 'New Apartment Complex, Islington'
2. Select a project Category from the drop-down menu
3. Enter the project Site Details: ◦ Site Address ◦ Approximate total project budget ◦ Quotes due by date ◦ Anticipated construction start and end dates
4. Your Contact Details will be pre-populated with your E1 User details. You can edit these here if a colleague is the main contact for the project
5. Select your project privacy settings in the Doc Requests section.
- If you would like any subcontractor or supplier to be able to access and download project documents, select 'Auto-approve all download requests'
- If you prefer to approve or reject subcontractor or supplier access on a case-by-case basis, select 'I must first approve download requests'
6. Note a Description of Works to provide a brief project overview. For example: an overview of the scope, the number of stages, floor area, etc.
7. Click Save & Continue
Step 2 - Selecting Trades
1. Choose the trades you are seeking coverage for on this project by checking all required tick boxes. Subcontractors and suppliers in these trades will be matched with your project.
2. Once you're happy with your selections, click ’Next Step: Documentation’


Step 3 - Uploading Documents
1. Drag and drop, or browse files on your computer to upload them to your project

2. Optional - you can click on any uploaded documents to review or rename documents as required

3. Once you're happy with your files, click: ’Next Step: Document Matrix’

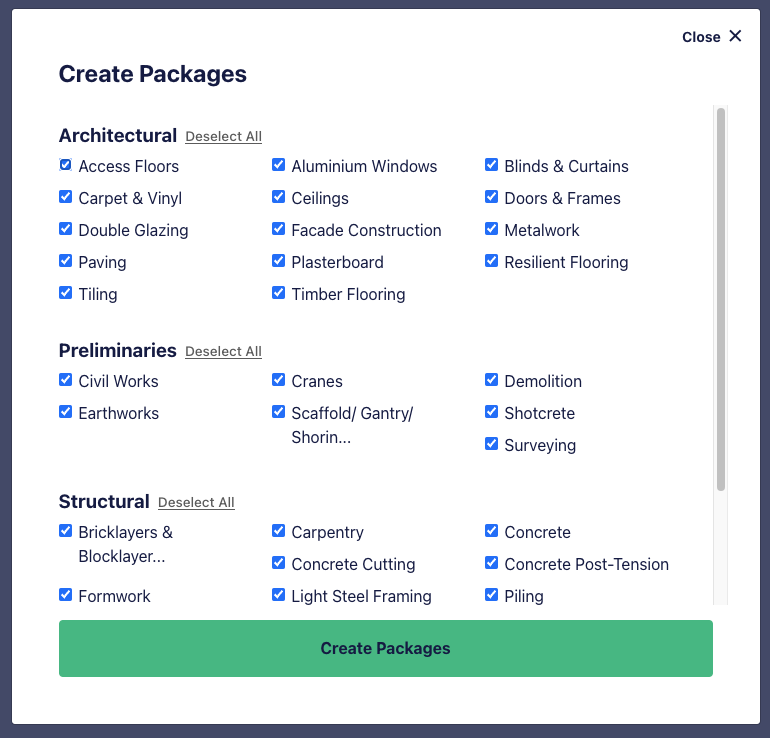
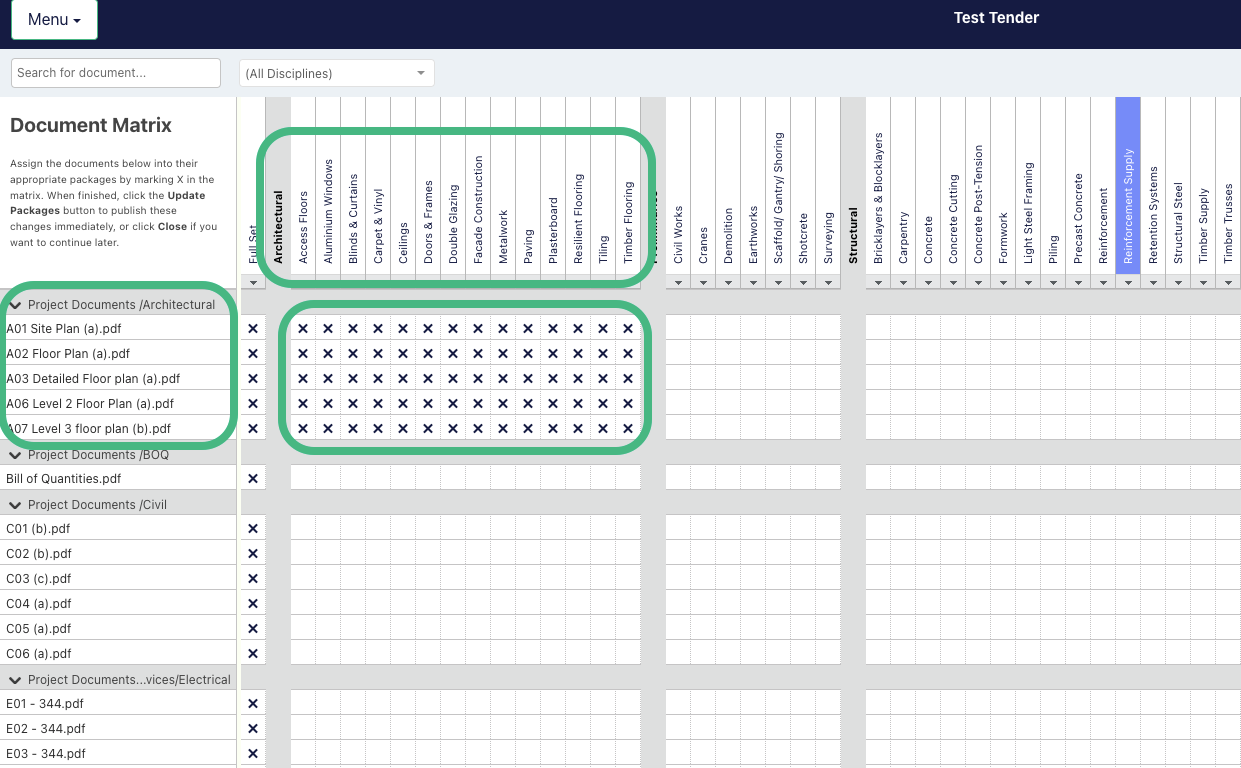
Step 4 - The Document Matrix
1. After clicking 'Next Step: Document Matrix', you'll be presented with a pre-populated checklist of all trades to create packages for. This is pre-selected based on the trades nominated in Step 2.
If you want to remove any at this stage, untick the associated checkbox. Otherwise, click 'Create Packages'.
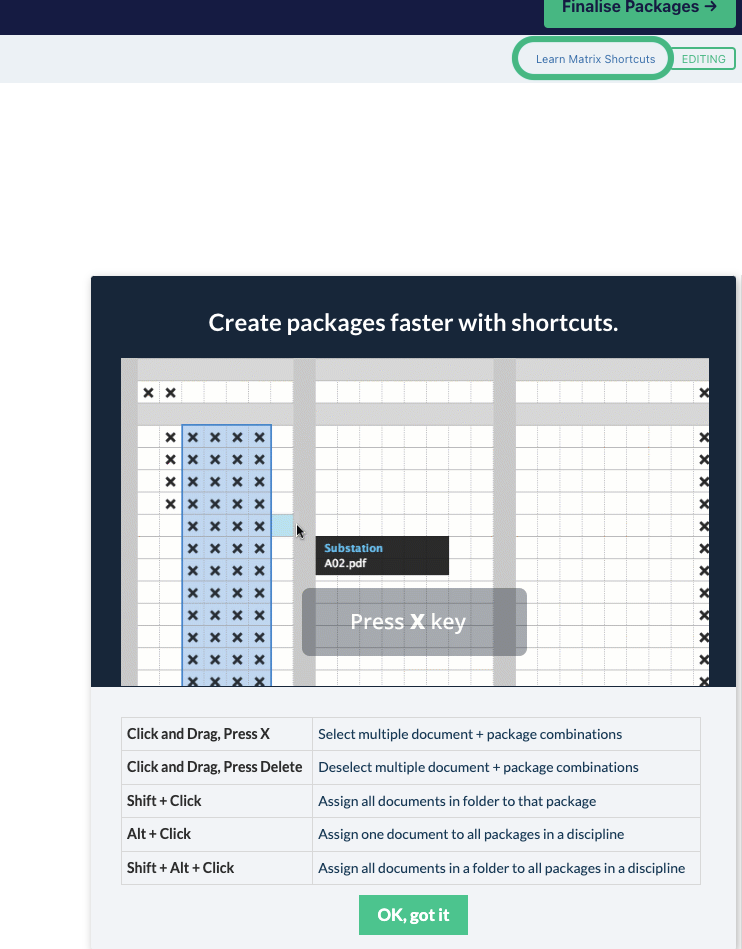
2. You'll now be presented with a grid showing your pre-nominated trades across the top, and the document folders and documents down the left hand side.
Click into each square or section of the matrix to allocate documents by trade, until you're happy with the selections.
3. Once you've finished updating the Document Matrix, click ‘Finalise Packages’.
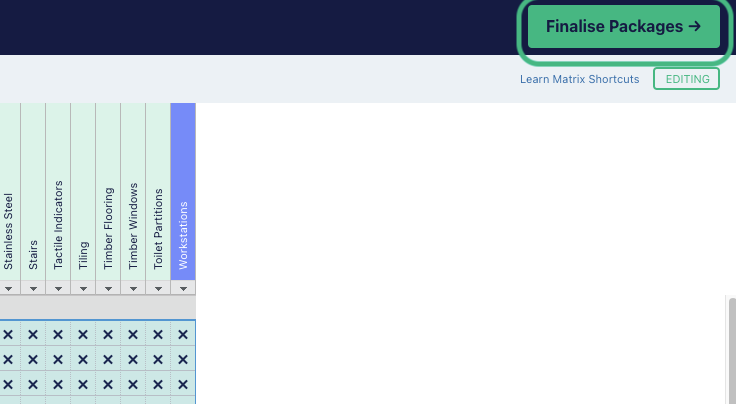
4. Now click 'Confirm'
Your project is now live on the E1 tender noticeboard, and discoverable by subcontractors and suppliers matching the trades you nominated for the project.

Managing requests from subcontractors and suppliers
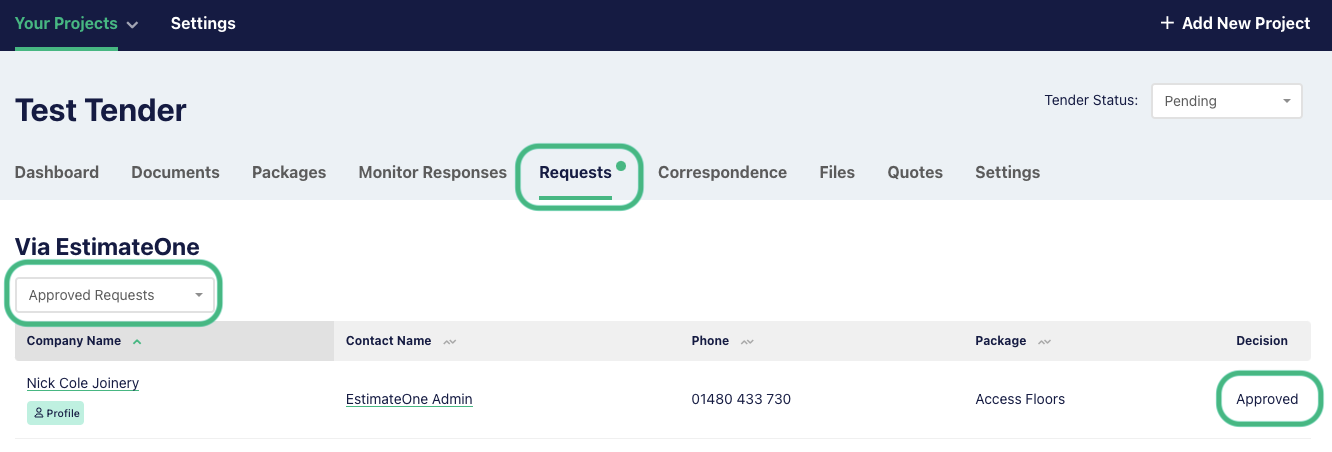
If you nominated to approve a subcontractor or supplier’s access to project documents, you'll receive requests that can be approved or rejected under the Requests tab of the project:

1. Access the Requests tab to view subcontractor/supplier requests for access, you'll see a list of any Pending Requests.
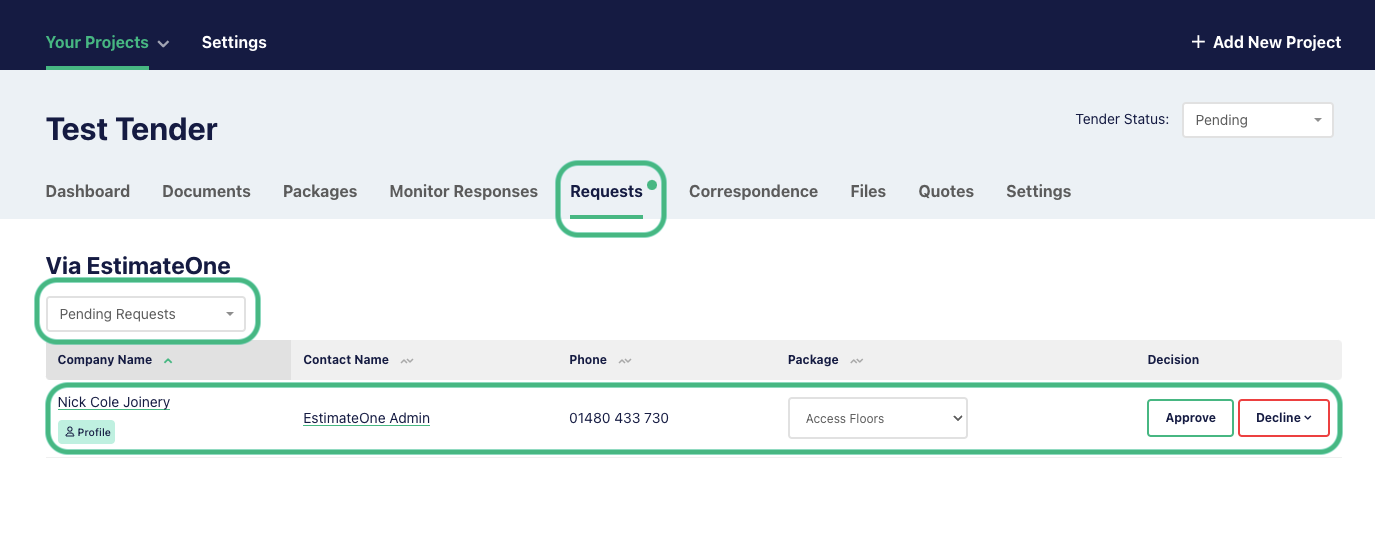
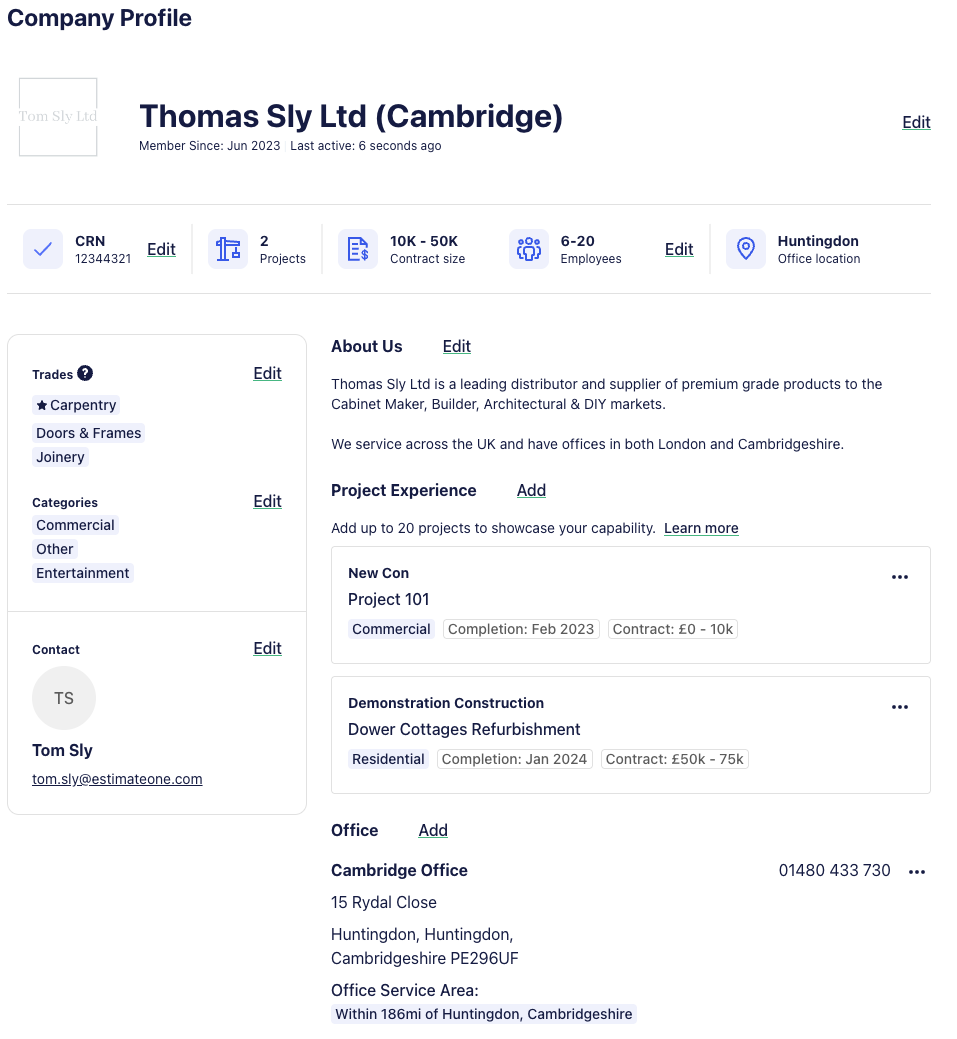
2. You can instantly Approve or Decline the subcontractor's/supplier’s request at this stage, however, if the company is new to you, we highly recommend checking out their profile first.
Click on their Company Name, and you'll be taken to their profile where you can check them out to see if they may be a good fit.
3. Once the company’s request is approved or rejected, you'll see be able to see them by toggling the dropdown to show Approved, Rejected or Pending requests.
Support and Assistance
For any queries or assistance, you can contact our friendly team via email support@estimateone.co.uk or phone +44 20 3868 4986