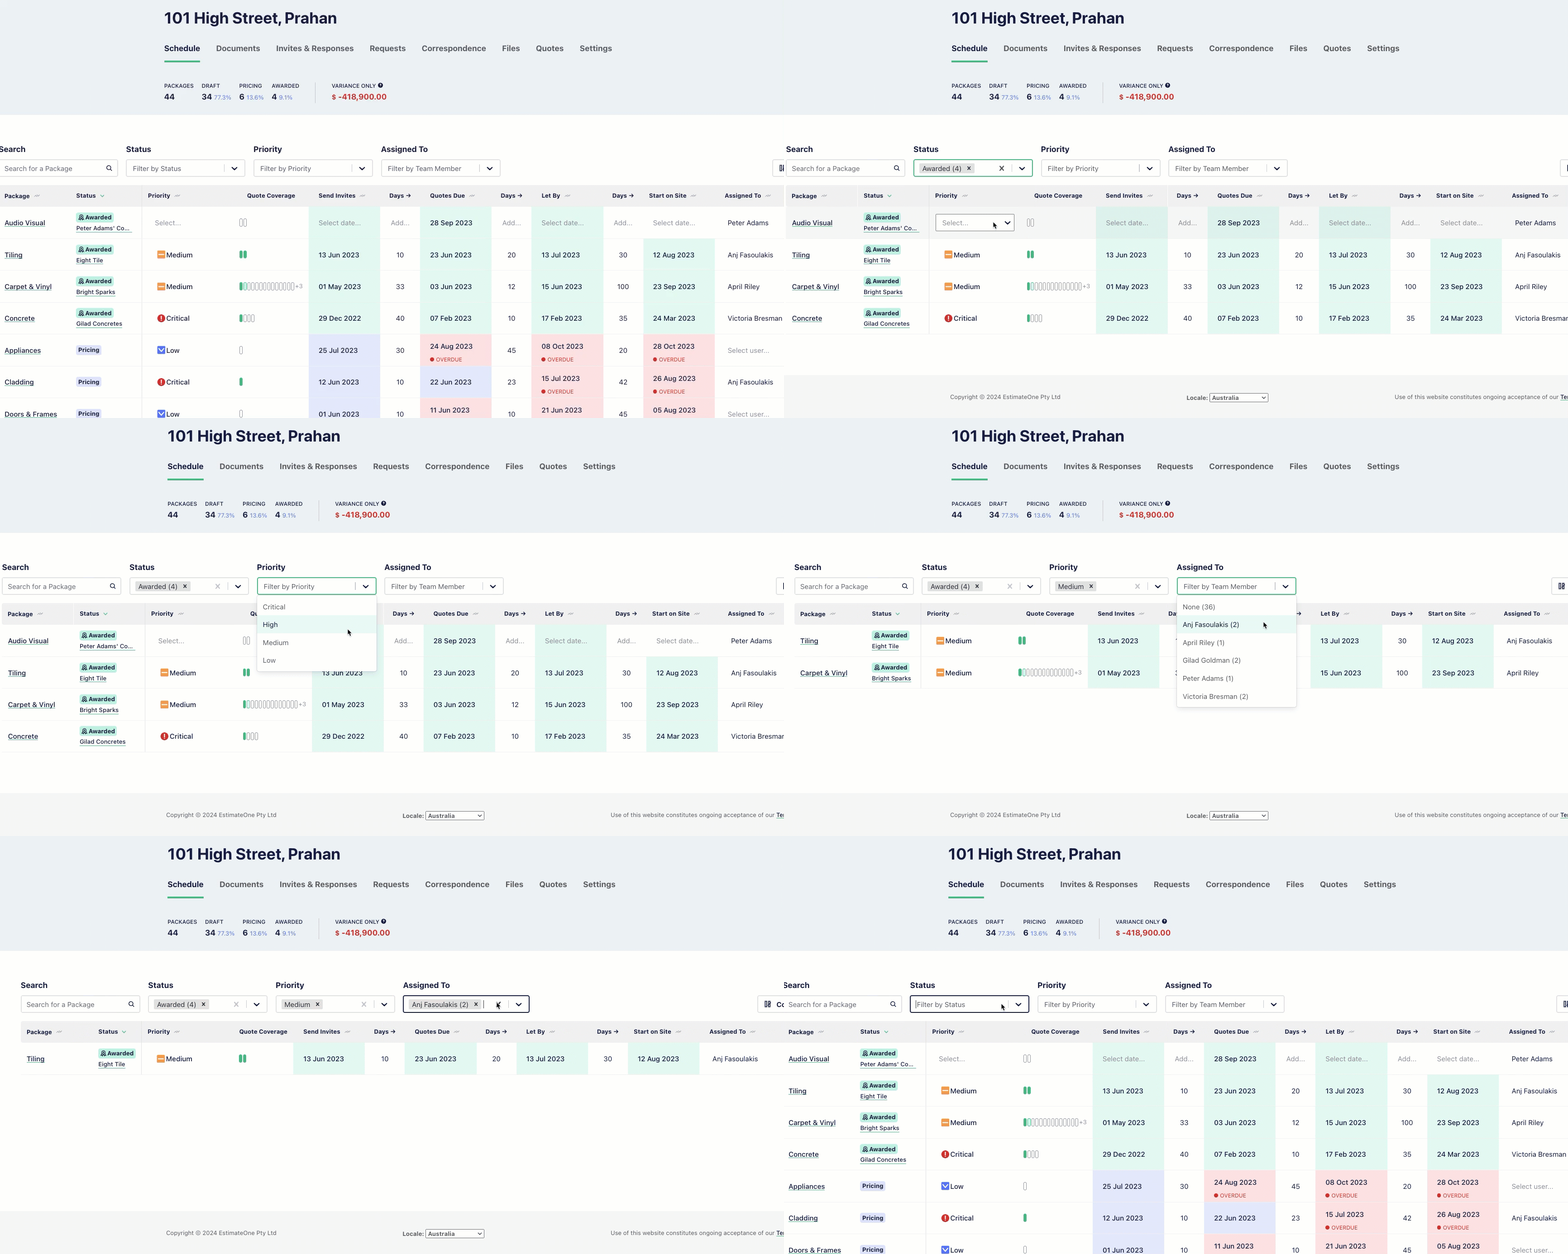
You can customise the Letting Schedule to view the information that’s most important for your project. Use filters or column customisation to surface the info you need.
Using filters
Create a view of your Letting Schedule that shows only what you need to see, so you can focus on the packages you need to work on.
Filter the letting schedule by:
- Package Status (Draft, Pricing or Awarded)
- Priority (Critical, High, Medium or Low)
- Assignee (Any assigned team member/s)

Customising Letting Schedule columns
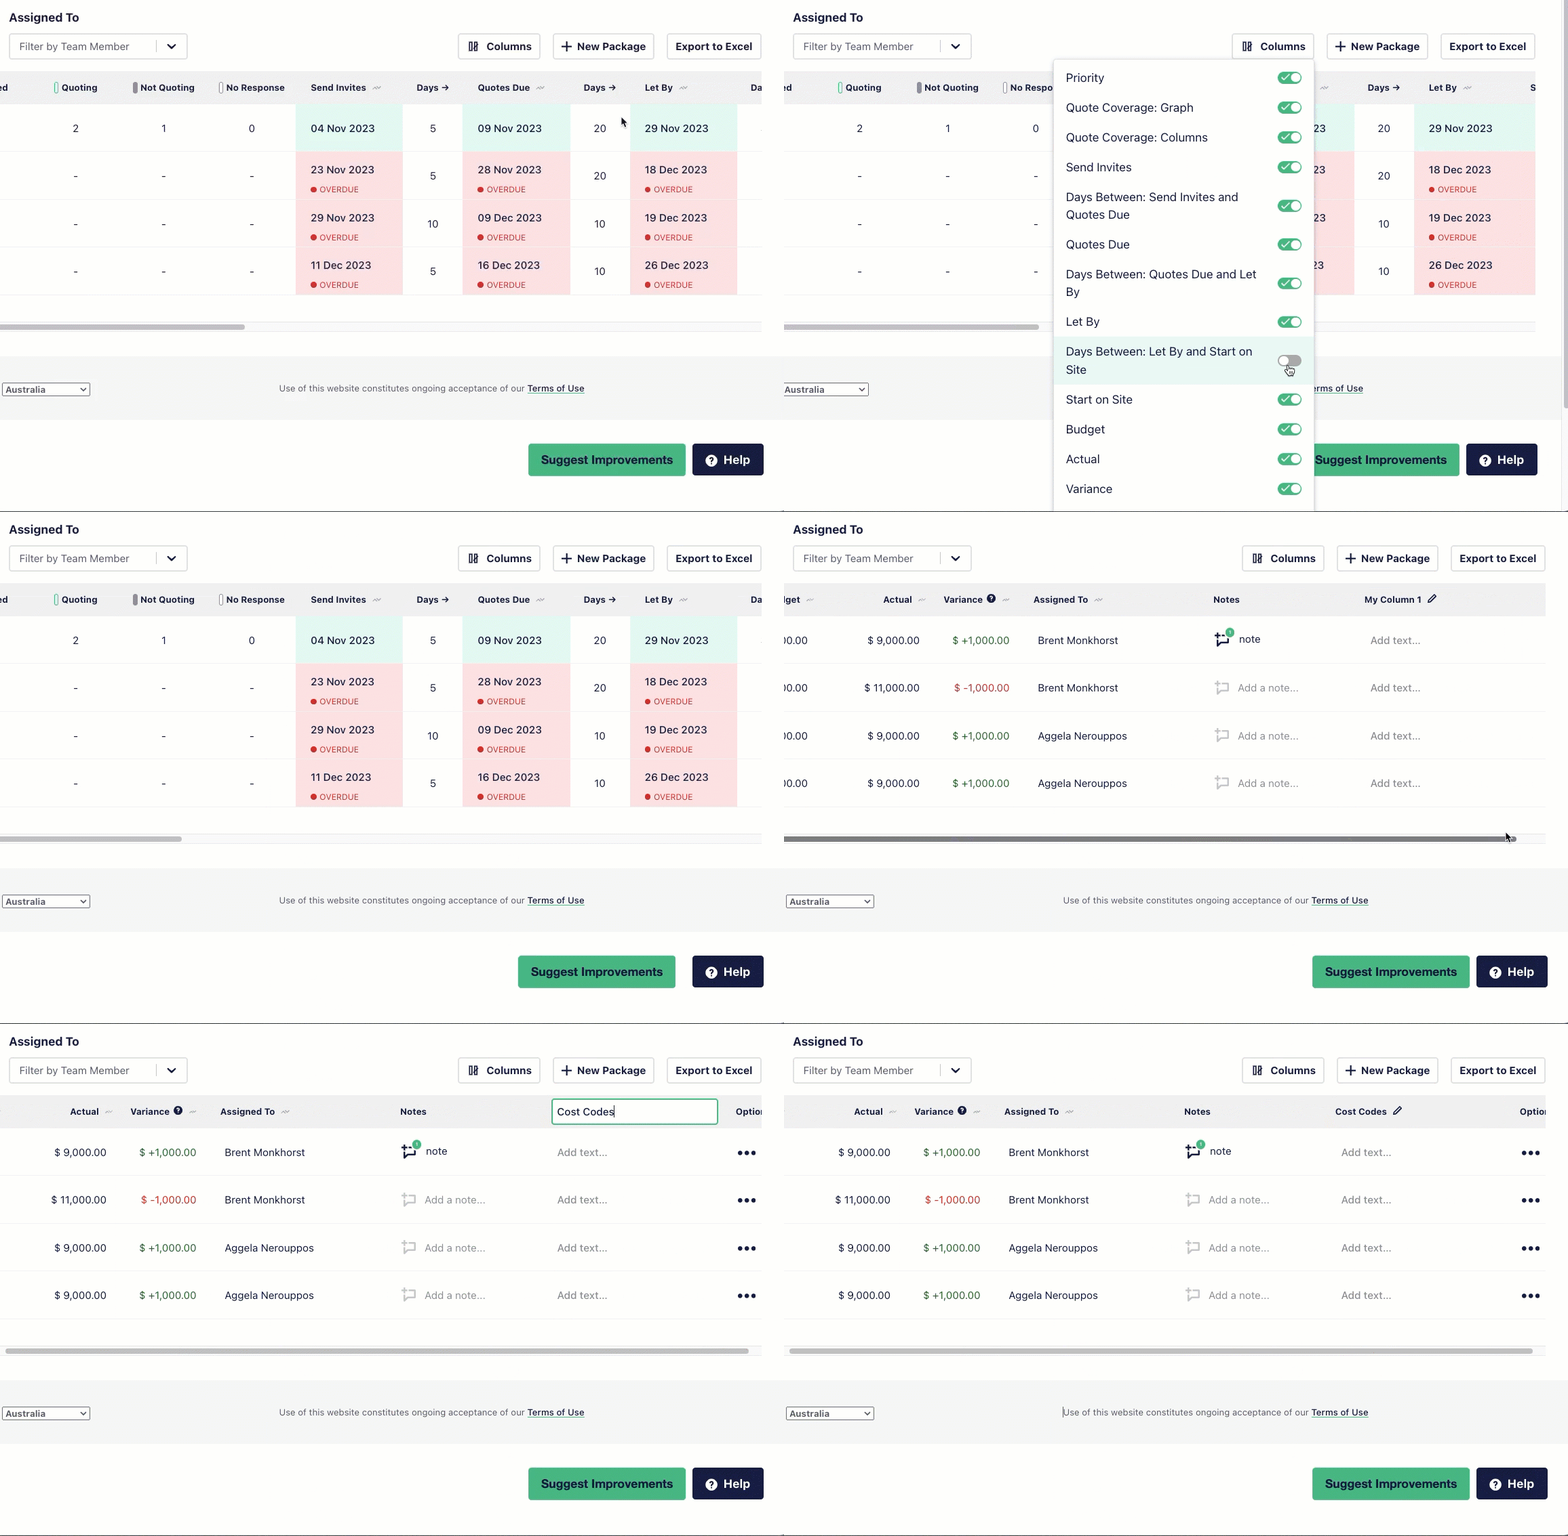
You can show and hide columns on your Letting Schedule to tailor your view by toggling a column on or off or create up to 2 custom columns unique to your projects.
Custom Columns are columns that you can add to your letting schedule which do not already have a title determined. This allows you to create a brand new column to track any information you would like against each package. An example of why you may use this is to track a Cost Codes or a CHEOPs number. There are two 'My Columns' available per letting schedule and they can be different on every project.
To toggle which columns you view:
- Click on the ‘Columns’ button at the top of the Schedule. You’ll see a list of column options.
- Activate or deactivate a column from view by clicking the toggle button to green for active, or grey for inactive
To create a custom column:
- Create custom columns by activating either ‘My Column 1’ or ‘My Column 2’
- Once active, click the pencil icon to edit the name of the column
